A2S documentation has been moved to the Wiki.
This page may not be up-to-date.
This page explains how to create an AnimSpriteSet.
An AnimSpriteSet is a combination of textures and information describing how they will be trimmed and displayed as a sprite.
Contents:
- Contents:
- How To Make AnimSpriteSet
- Details for the Capture Settings
- Other Features
How To Make AnimSpriteSet
AnimSpriteSet is the data format handled by this plug-in and used to render the sprites.
It contains multiple animations and corresponds to a single sprite character.
Opening Editor
First, opening an empty level is recommended since the editor adds actor(s) on the current level.
And then run EUW_AnimSpriteCapture (Just click the tool bar button).

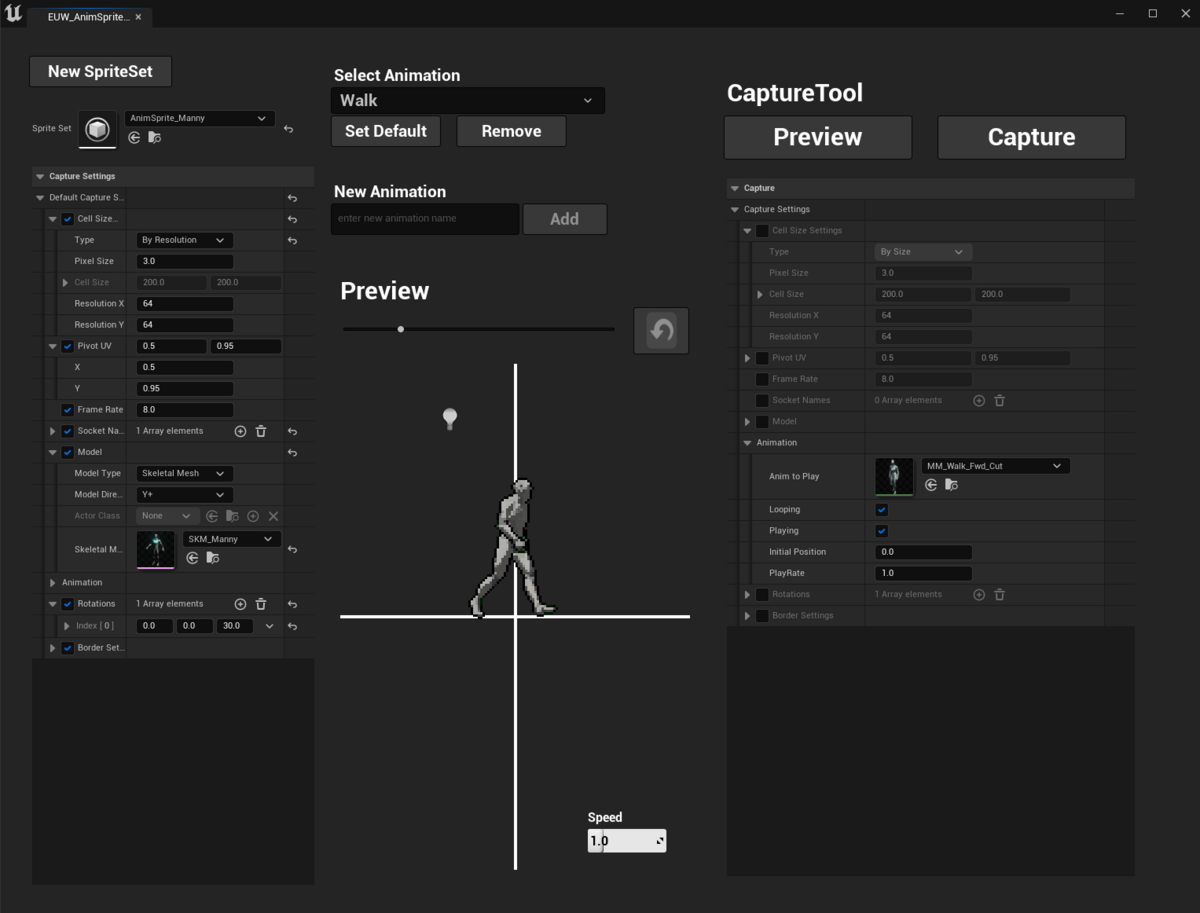
Editor parts description
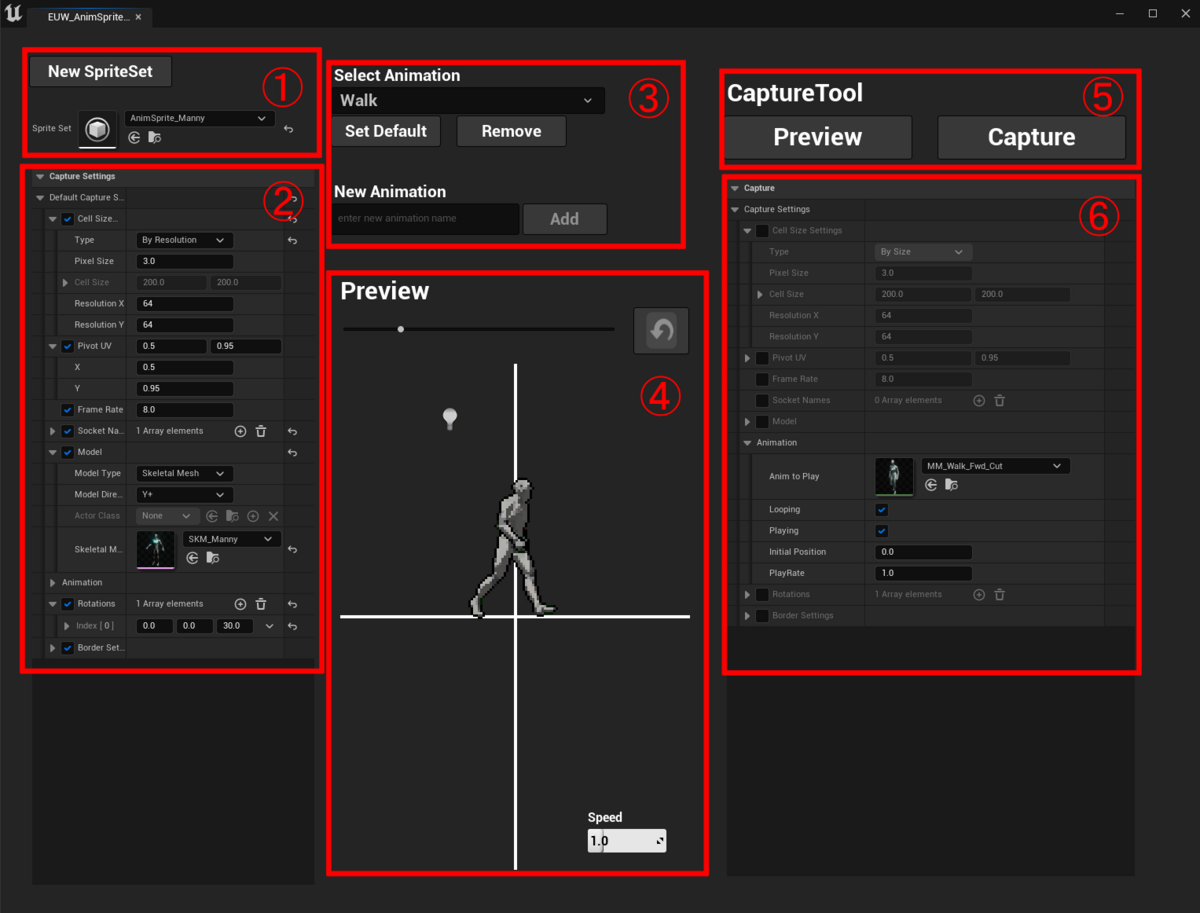
①AnimSpriteSet
Creating new AnimSpriteSet
Press "New SpriteSet" button to create a new AnimSpriteSet.
Existing AnimSpriteSet
Set "Sprite Set" in ordinary way.
D&D / Select in content browser->arrow / Choose from the dropdown list.
②Common capture settings
Here are the basic settings for capturing.
These settings can be overridden for each animation.
Details of the settings are described below.
③Animation list(combo box) and new animation
To create a new animation
Enter a new animation name in the textbox to the left of the "Add" button and then press the "Add" button to create a new animation.
To select an existing animation
Choose from the combobox below the text "Select Animation".
④Preview Sprite
A preview of the animated sprite is displayed here.
The display scale, orientation (if set), and animation speed can be changed via controls.
⑤Capture Buttons
Caution : Before doing this, animation should be set in the ⑥Animation specific capture settings.
Preview
This button places actors and a frame indicating the capture area, allowing you to preview how they will be laid out on the texture.
Back view may be the best for this.

Capture
Capture is performed and textures are generated.
Textures are generated in the same folder as the AnimSpriteSet.


⑥Animation specific capture settings
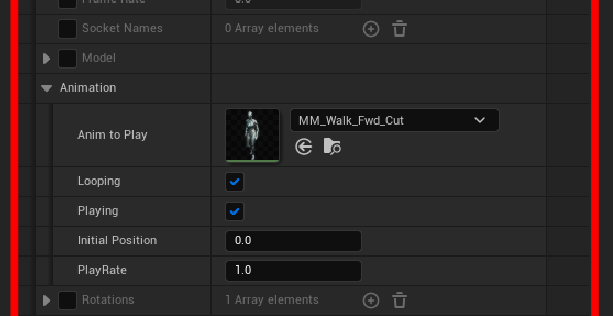
First, the Animation section must be set up.
For "Anim to play" you can use AnimComposite as well as AnimSequence.
Other items inherit common settings(②), but can be overridden by turning on the checkboxes on the left.
Details for the Capture Settings
Properties:
[Cell Size]
This determines the size of the sprite in the scene and its resolution on the texture.
There are two ways to specify them.
- By Resolution : Sprite's size is determined by PixelSize and resolution("ResolutionX" and "ResolutionY" properties)
- By Size : Resolution is determined by PixelSize and Sprite's size("Cell Size" property)
"PixelSize" property is a common item that specifies the size of a single pixel in unreal units.
[Pivot UV]
Specifies the pivot point by a value relative to the sprite's size.
(0.5, 0.5) means the center of the sprite.
(0.5, 1.0) means the bottom center of the sprite.
[Frame Rate]
Specifies the number of frames per second.
A higher number of frames allows for smoother animations, but increases the texture size.
[Socket Names]
Transforms are recorded for the specified sockets.
This doesn't work well with Billboard materials (because they transform sprites according to the viewpoint).
[Model]
Here, you specify the shape data that will be used as the source of the sprite.
Two model types are available.
-Actor Class : Actor class (BP is good, too) with SkeletalMeshComponent
-Skeletal Mesh : Skeletal Mesh asset
"Model Direction" property specifies which is the "forward" direction of the model.
In most SkeletalMesh, Y+ is the forward direction, and in Actor, basically X+ is the forward direction.
[Animation]
Specifies the original animation of the sprite.
AnimSequence and AnimComposite are available here.
[Rotations]
Rotation applied to the model.
Multiple values makes multi-directional sprite (requires more texture size).
This button allows you to switch the rotation of the preview.

[Border Settings]
Mainly for outlines.
"DepthGapThreshold" specifies the depth gap (in unreal unit) threshold to make in-silhouette lines.
 Small "DepthGapThreshold" case (lines appear around the right arm)
 Large "DepthGapThreshold" case
Other Features
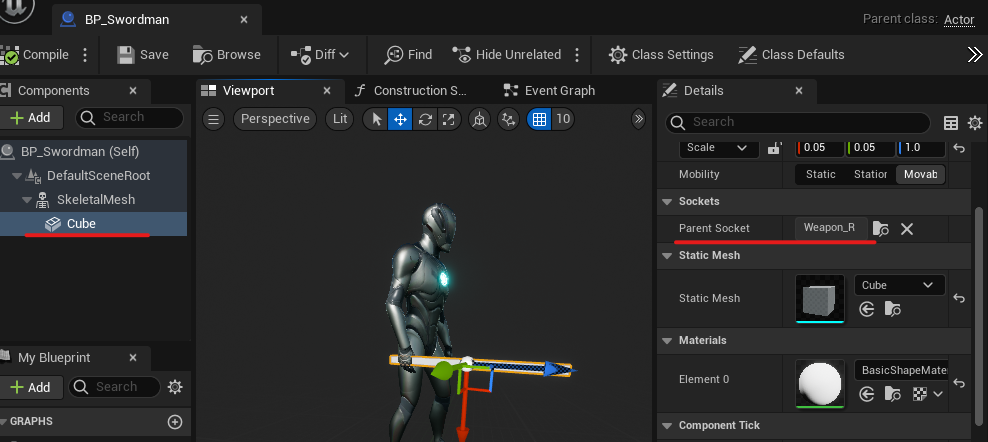
To use modular characters
You need to create an Actor Blueprint to create a modular character sprite.
1. Static Mesh parts:
Simply attach a StaticMeshComponent to a Bone or Socket.
2. Skeletal Mesh parts with animation:

Caution : this character is not contained in the package
To sync skeletal meshes, there are some methods.
1 : SetLeaderPoseComponent (old : SetMasterPoseComponent)

Use MasterPoseComponent (Leader Pose Component in UE5.1 and later version) to combine the base SkeletalMeshComponent with the parts(they need to share the skeleton).
Modular Characters in Unreal Engine | Unreal Engine 5.0 Documentation
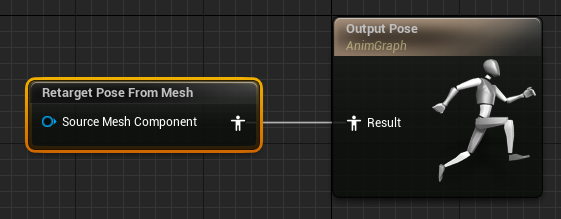
2 : AnimBP
If skeletons differs between the base skeletal mesh and the parts, you need to use AnimBP to match the poses.
Place the parts mesh under the base mesh in the hierarchy and parts should have AnimBP that copies / retargets poses from base.

Retouching
Textures can be exported (as .TGA files) and retouched in Photoshop or other image editors.
 begore
 after
after
A slash effect have been added.
By reimporting this over the original texture, the effect is added to the sprite animation.